Philips PD5029S Service mode and information
Why and background information
This was a weird find. The Philips PD5029S is from a series of presentation monitors that were released in the US and EU. They have a lot of inputs, and can take some forms of VGA. All in all, it’s kinda rare to find those.
Another problem is that to do any configuration that demands the service menu is basically impossible unless you have access to the special service menu tool that Philips vendors and authorized services had.
There’s very little information about this set on the web, and the only real official page is an archived one on The Wayback Machine Magnavox website.
This may also apply to other PD models and models based on the GFL 2.2 chassis, like the PD 2059 M, E, or similar.
Inputs and SCART
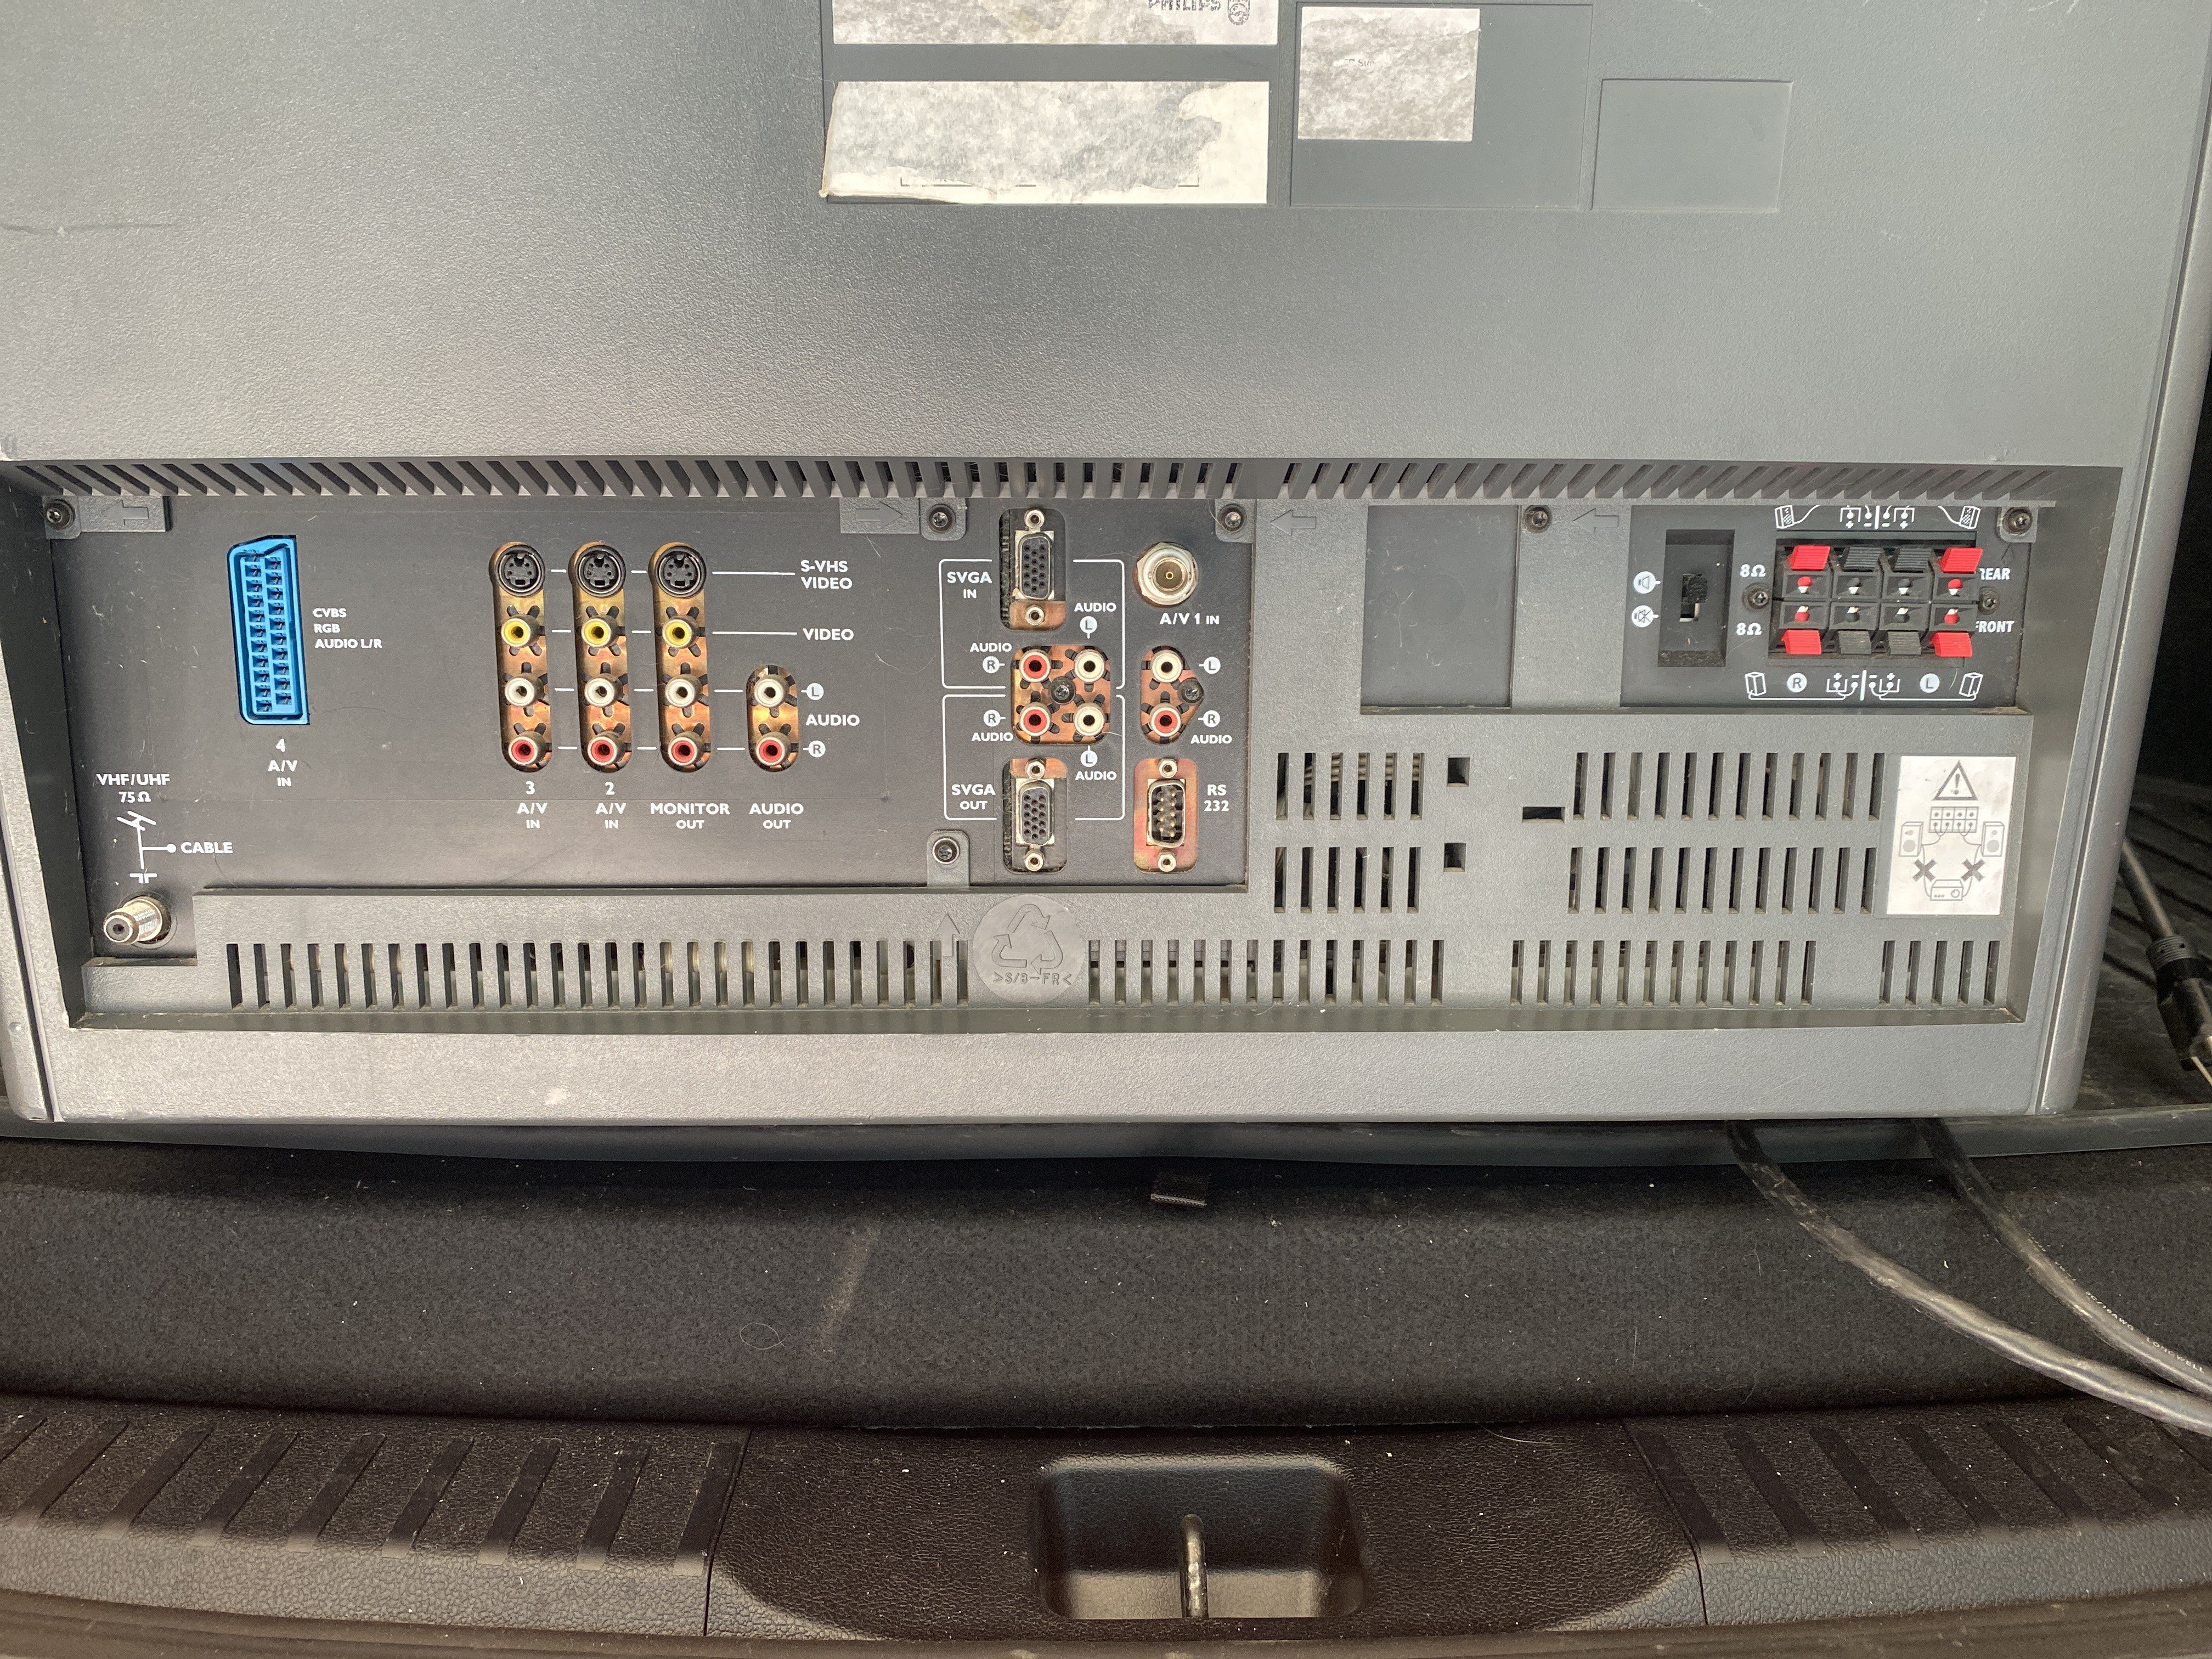
The set has plenty of inputs, including a VGA one, and a SCART. The SCART works according to spec and expects 5v on pin 16, and I was sucessfull inputing composite sync (csync) on pin 20, but attenuated with a 470 ohm resistor since I use an extron that outputs TTL level sync. I based my pinout on this image, making the adjustments for my situation (I didn’t need to deal with HSYNC/VSYNC).
For reference, this is extracted from a set that uses a slightly different version of the same chassis as the PD2059S, that one having two SCART inputs instead of one, but I have confirmed that all the pins and functions on this match the one on the 2059.
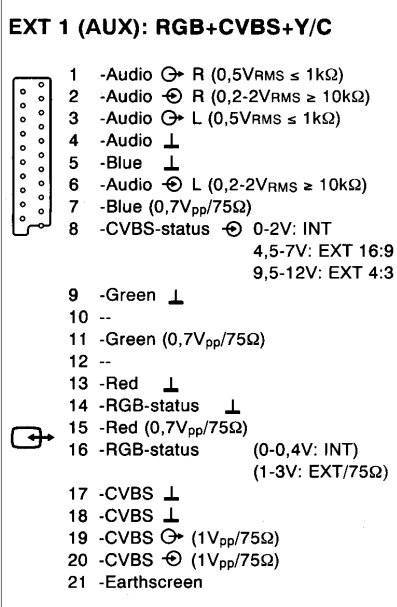
I haven’t tested the stuff on pin 8, that is supposed to change the aspect ratio and etc, but during my test it worked fine for consoles (Saturn, Dreamcast, and MiSTer) only with the 5V on pin 16 (without it I got a black screen).
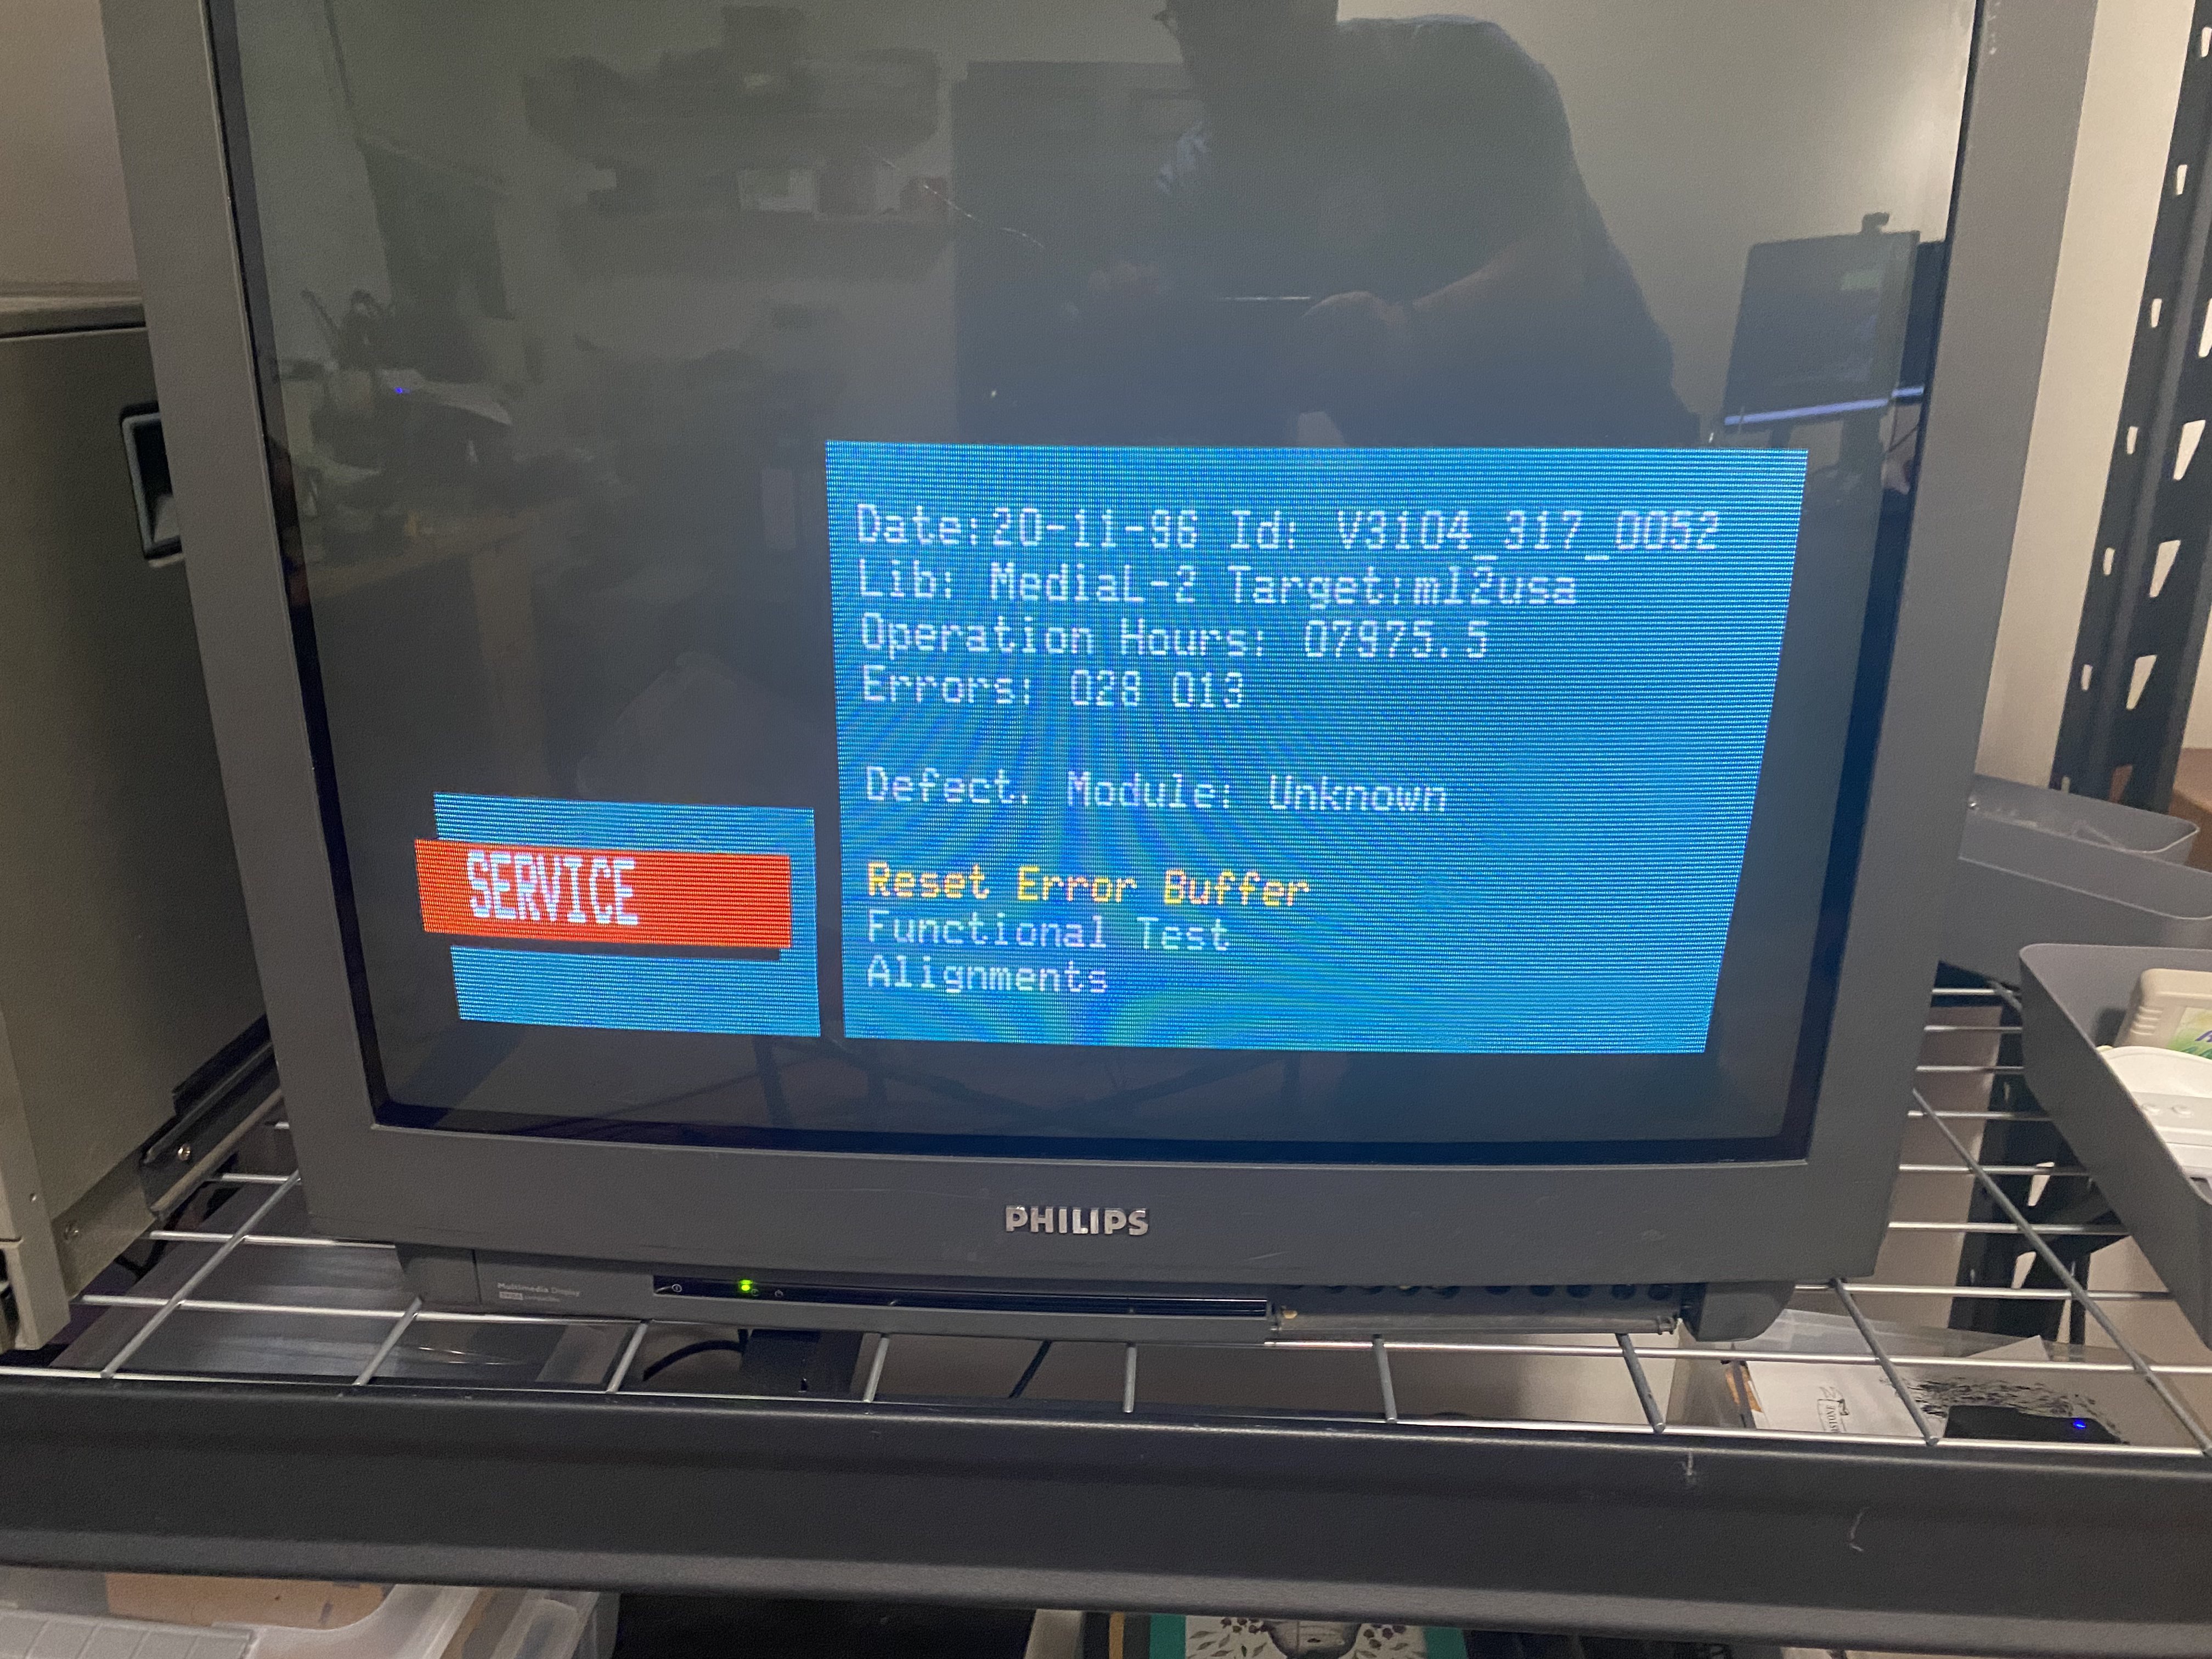
Service mode
The most annoying part was trying to get into the service menu. I considered giving up, but then I found the awesome site by Marcel Majoor where there’s a large amount of information about Philips and other TV remote control codes.
Based on the Pronto codes that they listed there, I was able to write a little Arduino code that literally the only things it does is to enable the service mode.
Arduino stuff
What you need:
- An Arduino. I think I used a Pro Micro or similar.
- An IR LED
- Something to connect those things, I used a prototype board, but anything will do
I just connected the IR LED to pins 18 and GND on the Arduino, and uploaded the code below via Platform.io. I am sure it can be ran on the Arduino IDE equally easilly.
The code has a 3 second delay in the beginning before sending the IR sequence, because I didn’t want things to happen while I can’t see.
I didn’t add a resistor to the LED, since I was using it so fast, but should probably be included for a more consistent usage/setup.
The options on the Service Menu are pretty standard and well explained. I may update this in the future if I find anything specifically interesting, but with the information above anyone should be able to use this great set.